Testing your events is an essential step before fully implementing them in your live environment. The Test Event Code feature in Events Manager allows you to send events in a safe testing mode and verify that they’re being received correctly. In this guide, we’ll walk you through how to use a Test Event Code to send and validate your first test events.
Make sure your Facebook Pixel is connected through the app. Then:
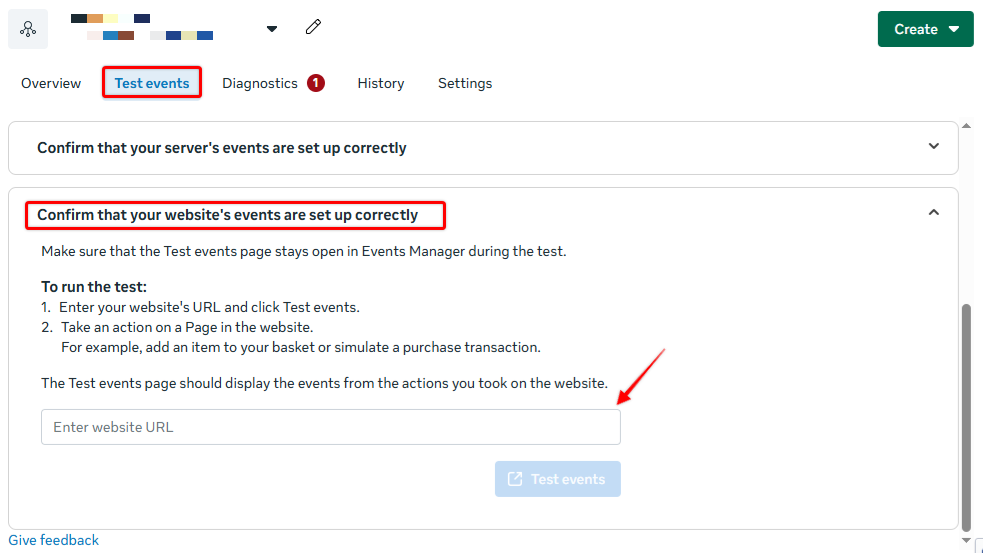
Go to Meta Events Manager – Test Events tab
Enter your store URL in the test field and click Test events
On your store, perform actions such as: viewing a product page, adding a product to cart, initiating checkout, completing a purchase
Return to Facebook Events Manager to confirm that events like Page view, View content, Add to cart, Initiate checkout, and Purchase are appearing in real time
If you've enabled CAPI, follow these steps to test:
In Meta Events Manager, get your Test Event Code
Enter this code into the Test Event Code field in our app
Perform the same actions on your storefront
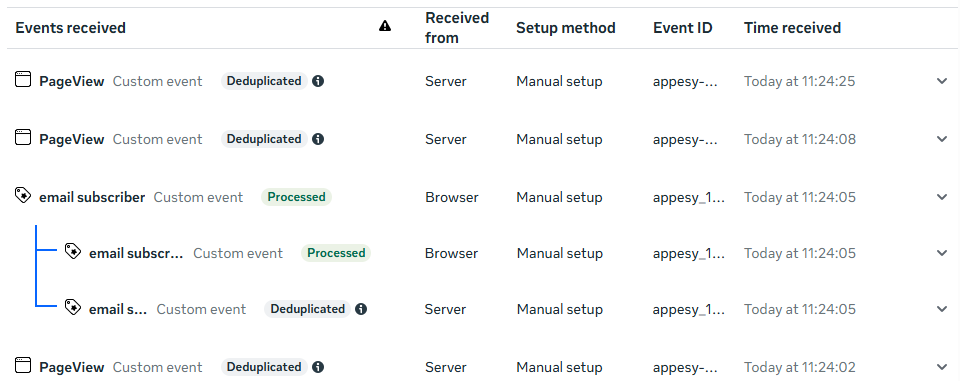
Server-side events will now show up in the Test Events tab, marked as coming from Server
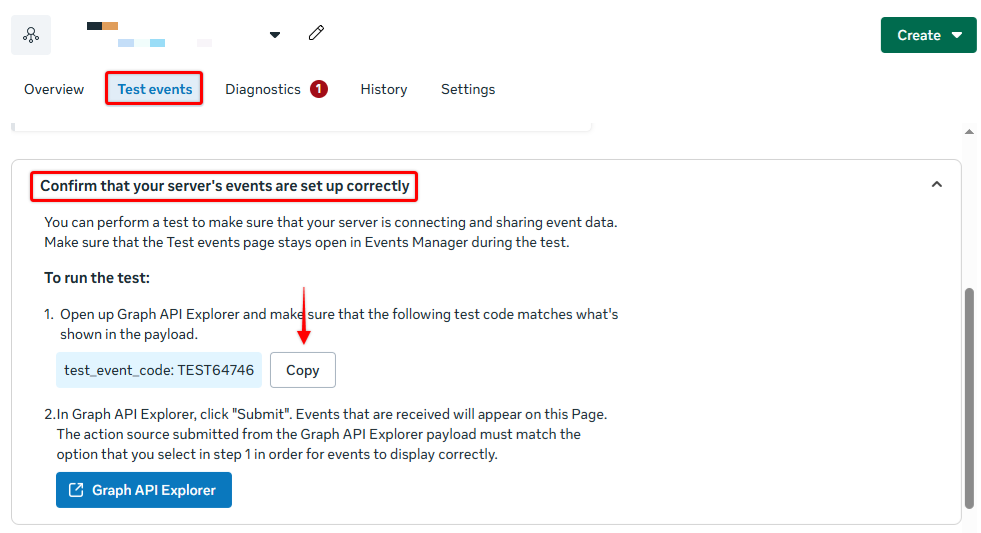
Test Event Code
When both Pixel (browser) and CAPI (server) are sending the same events (like a purchase), Facebook will deduplicate them automatically, as long as the events share the same event_name and event_id.
Our app should automatically handle deduplication logic. In Events Manager, you may see both sources reported, with one flagged as deduplicated.