Welcome aboard! 🎉
This guide is designed to help you set up your Facebook Pixel & Conversion API (CAPI) quickly and correctly so that you can start tracking, optimizing ads, and improving campaign performance.
Before sending events to Facebook, you need to create or connect a Pixel (now referred to as a “Dataset” in Meta Events Manager).
Option 1: Use an existing Pixel
Go to Meta Events Manager
Choose your Business Manager and select an existing Pixel (Dataset)
Option 2: Create a new Pixel (Dataset)
Go to Meta Events Manager
Click “Connect Data Sources” > “Web”
Select “Conversions API” > click Next
Enter your Pixel name (e.g., “Shopify Store”) and choose Set up manually → Conversions API and Meta pixel
Finish setup — don’t worry about installation steps; our app will handle that
To activate tracking:
In your Shopify Admin, go to Online Store > Themes > Customize
Click on App Embeds (bottom left)
Toggle Facebook Pixel & CAPI ON
Save your changes
This will allow the app to track Page view, Add to cart, Initiate checkout, and other key events.
Inside our app:
Pixel Setup
Go to Pixel & CAPI Configuration > Create Pixel
Enter your Pixel Name and Facebook Pixel ID
Select the pages you want to track

Conversion API
Enable Conversion API
Get your Facebook Access Token
In Meta Events Manager, select your Pixel, then open the Settings tab
Scroll down to the Conversions API
In Set up direct integration, click Generate access token and copy the code shown
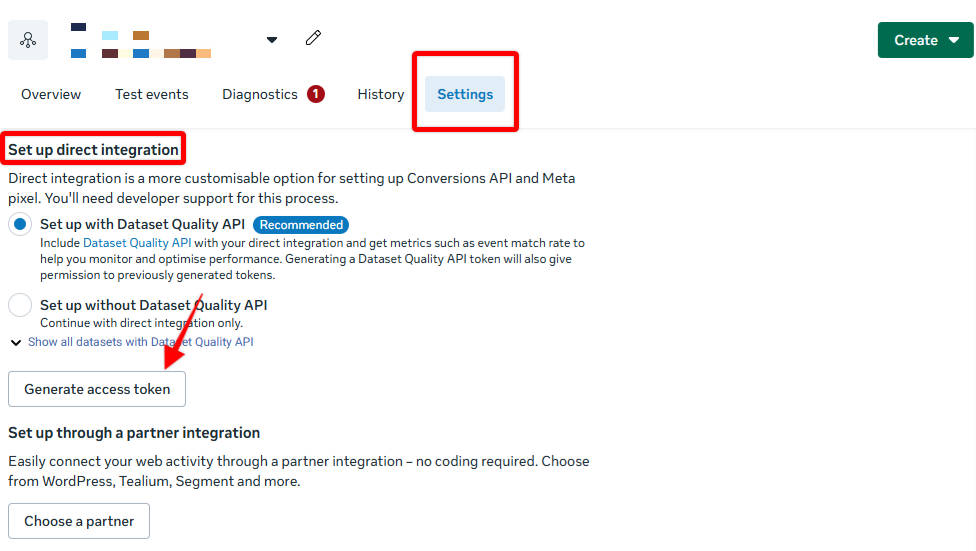
Generate access token
Enter Facebook Access Token and Test Event Code (Optional)
Standard Events
Select the events you want to track - At least one event must be selected to proceed.
Available tracking events:
Page view – When a visitor loads any page on your site
View content – When a visitor views a product detail page
Add to cart – When a customer adds a product to their cart
Initiate checkout – When a customer starts the checkout process
Add payment info – When a customer enters their payment information
Purchase – When a customer completes a purchase
Search – When a visitor uses the search function on your website
1. Test Browser Events (Pixel)
Make sure your Facebook Pixel is connected through the app. Then:
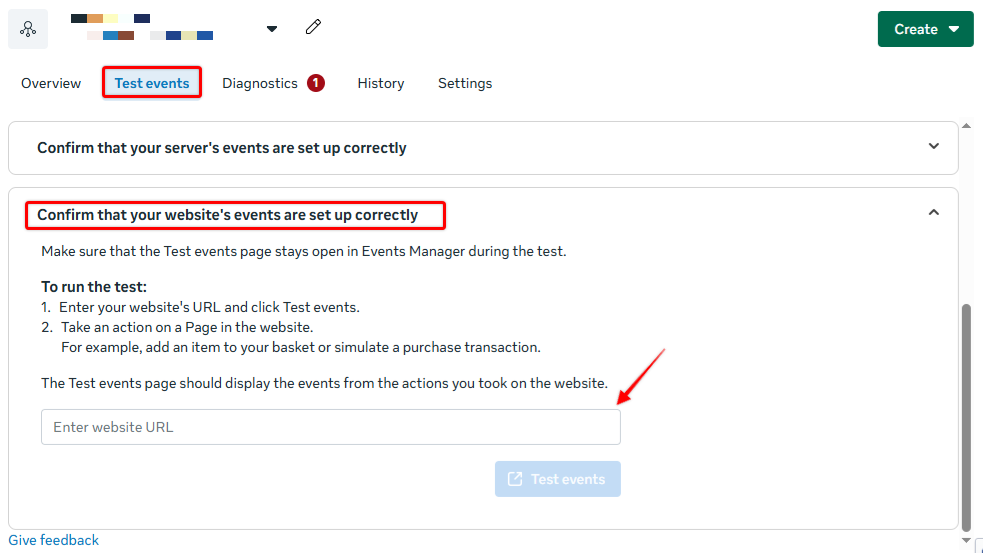
Go to Meta Events Manager – Test Events tab
Enter your store URL in the test field and click Test events
On your store, perform actions such as: viewing a product page, adding a product to cart, initiating checkout, completing a purchase
Return to Facebook Events Manager to confirm that events like Page view, View content, Add to cart, Initiate checkout, and Purchase are appearing in real time
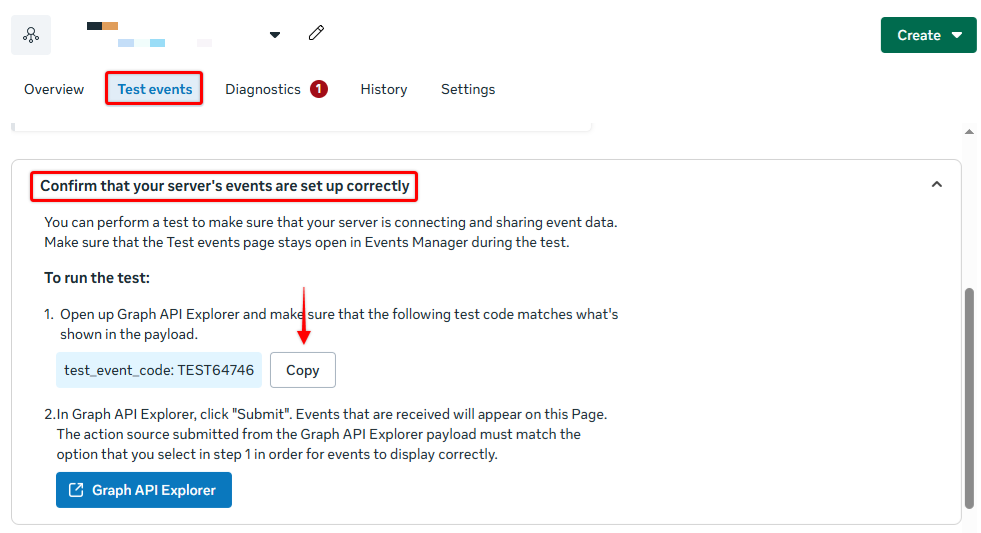
2. Test Server Events (Conversion API)
If you've enabled CAPI, follow these steps to test:
In Meta Events Manager, get your Test Event Code
Enter this code into the Test Event Code field in our app
Perform the same actions on your storefront
Server-side events will now show up in the Test Events tab, marked as coming from Server
Test Event Code
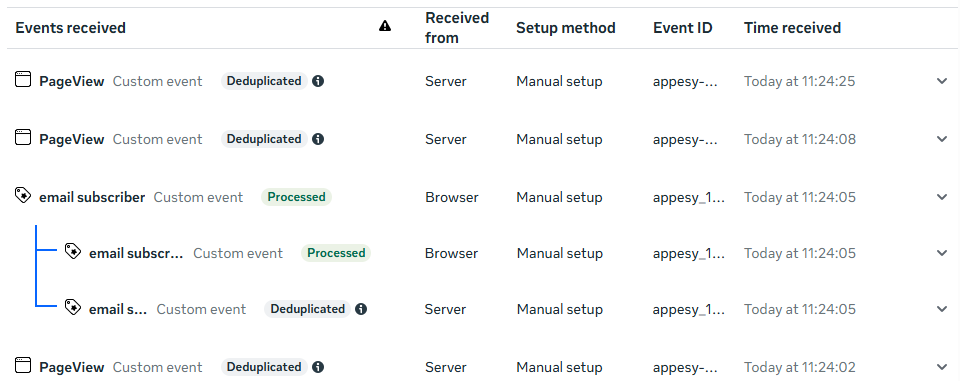
3. Check Event Deduplication
When both Pixel (browser) and CAPI (server) are sending the same events (like a purchase), Facebook will deduplicate them automatically, as long as the events share the same event_name and event_id.
Our app should automatically handle deduplication logic. In Events Manager, you may see both sources reported, with one flagged as deduplicated.