Custom events let you track user actions that aren’t covered by Facebook’s standard events. These can be actions that are important to your business, such as: using the search bar, submitting a form, clicking "Subscribe", clicking a "Contact" or "Review" button, and more...
They’re especially useful when you want to create highly targeted audiences based on specific behavior.
Step 1: Get the Button Selector
On your storefront, go to the page and find the button you want to track.
Right-click on the button and choose Inspect.
In the HTML code that appears, right-click on the highlighted line, then choose Copy > Copy selector.
Step 2: Create the Custom Event in the app
Open the app and click on the active Pixel.
Go to the Custom Events tab.
Click Add Custom Event.
Enter your Event Name (e.g., “SubscribeClick”) and paste the selector into the Element Selector field.
Click Add to save the custom event.
Step 3: Test Your Custom Event
After setup is complete, perform a test by visiting your storefront and clicking the selected button. Check Meta Events Manager to confirm the event was triggered.
After you’ve created your custom event, it’s important to test it to make sure everything is working correctly.
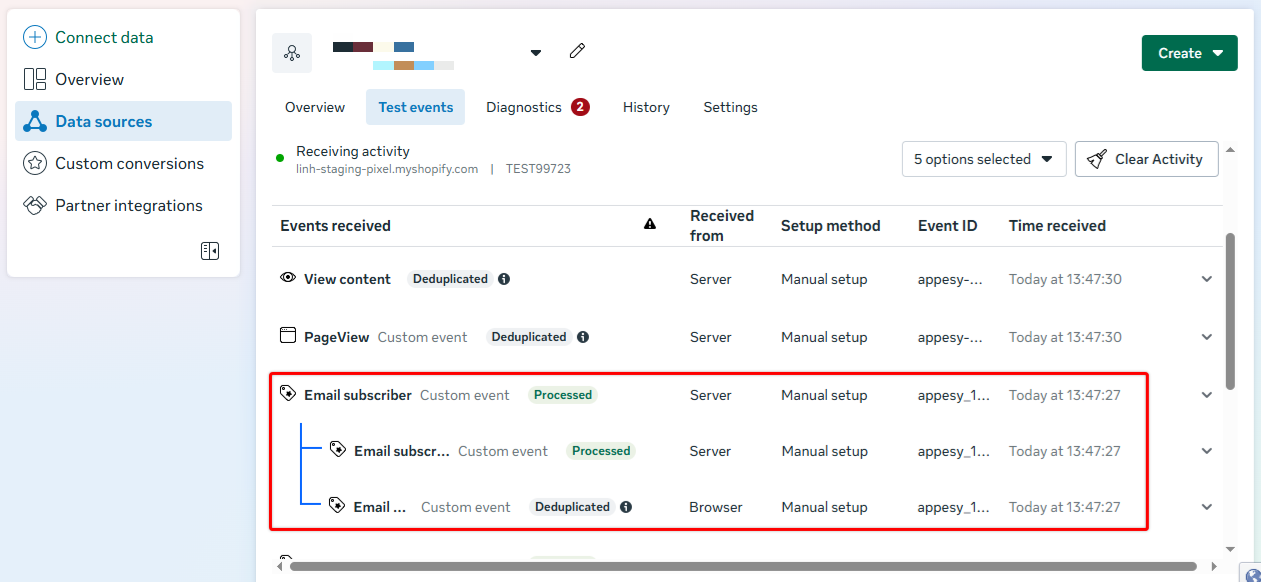
In Events Manager, click Test Events → copy the code into Test Events Code.
In the app, go to the active Pixel → paste the test event code.
Open your store, trigger the event by clicking the button that you set up the custom selector for.
Return to the Events Manager’s Test Events tab. You should see your custom event appear in real time.